
A desk saw is the cornerstone of most woodworking stores, and it’s neatly-known for making rip cuts, bevels, and crosscuts. What many folk don’t know is how versatile this instrument could presumably per chance per chance even be with the support of jigs and sleds to enable extra developed cuts. There are each form of sleds you could presumably per chance per chance construct on your saw, however a mammoth one to originate early on your carpentry profession is a jointing sled.
Jointing is the technique of knocking down one edge of a board except it reaches a excellent true angle to a face, allowing tight seams and factual fits. Nonetheless, a jointer could presumably per chance per chance even be an costly instrument, and one who takes up precious room. Constructing a jointer sled can assign you money and placement, and unruffled derive you the excellent, square edges you wish for quality builds. While you happen to don’t salvage the time to construct a jointer sled, you could presumably per chance per chance invent the an identical result with nothing extra than a 2- to 4-foot stage.
While you happen to haven’t labored with neatly jointed picket ahead of, this would presumably per chance change the manner you originate. The excellent comparison I’ve learned is after I switched from a division store guitar to a Gibson Les Paul. My woodworking improved practically overnight.
However ahead of we originate, establish that each the stage manner and a DIY jointer sled will easiest neatly joint the threshold of a board that already has a flat face. There are several the manner to flatten the face of a board, collectively with a planer sled, a router sled, or factual shopping for pre-flattened picket.
Solutions to joint picket with no jointer by the usage of a stage
Utilizing a stage is a mercurial, easy manner to edge joint boards on your desk saw, no building required. All you’ll need is a stage that’s longer than the board you’re trying to joint. I employ my 4-foot stage quite a bit of the time.
1. Put of residing your stage on the desk saw, flush against the fence. Then space the board it’s good to joint on the desk saw, against the stage, with the flattened face down. If one edge is concave, establish that against the stage. Your aim is to withhold the picket from transferring or rocking at all—you could presumably per chance per chance employ a hand airplane or sander to form the picket as wanted.
2. Location your fence to the factual width. Once the board is real, regulate your fence so the saw blade will clear off a sliver of the threshold of the board—basically a few blade’s-width, despite the truth that it in the slay is dependent on how bowed or misshapen the picket you’re starting up with is. Sooner than jointing, space the jig and board on the front after which on the wait on of the blade—as in the occasion you’d done slicing—to be sure you’ll clear the fat length of the board. Any uncut piece of the threshold received’t with no doubt be flat, and likewise you’ll must construct a second nick to repair it.
- Warning: Easiest enhance your saw blade so its teeth barely lengthen above the pause of the board you’re slicing. This can support offer protection to you when you bound and reach in touch with the blade.
3. Build your nick. With the board a long way off from the blade, turn the saw on, after which slowly push the stage and board ahead, keeping them transferring at regarding the an identical walk. Conserving each collectively could presumably per chance per chance very neatly be a small bit tricky, despite the truth that. I employ a GRR Ripper Pushblock on the board itself while my other hand pushes the stage. Are attempting to withhold the board from transferring alongside the length of the stage, or you could presumably per chance per chance derive a diminutive taper on your edge.
If you attain the nick, turn the saw off and treasure your perfectly flat, entirely square edge.
Solutions to construct a jointer sled
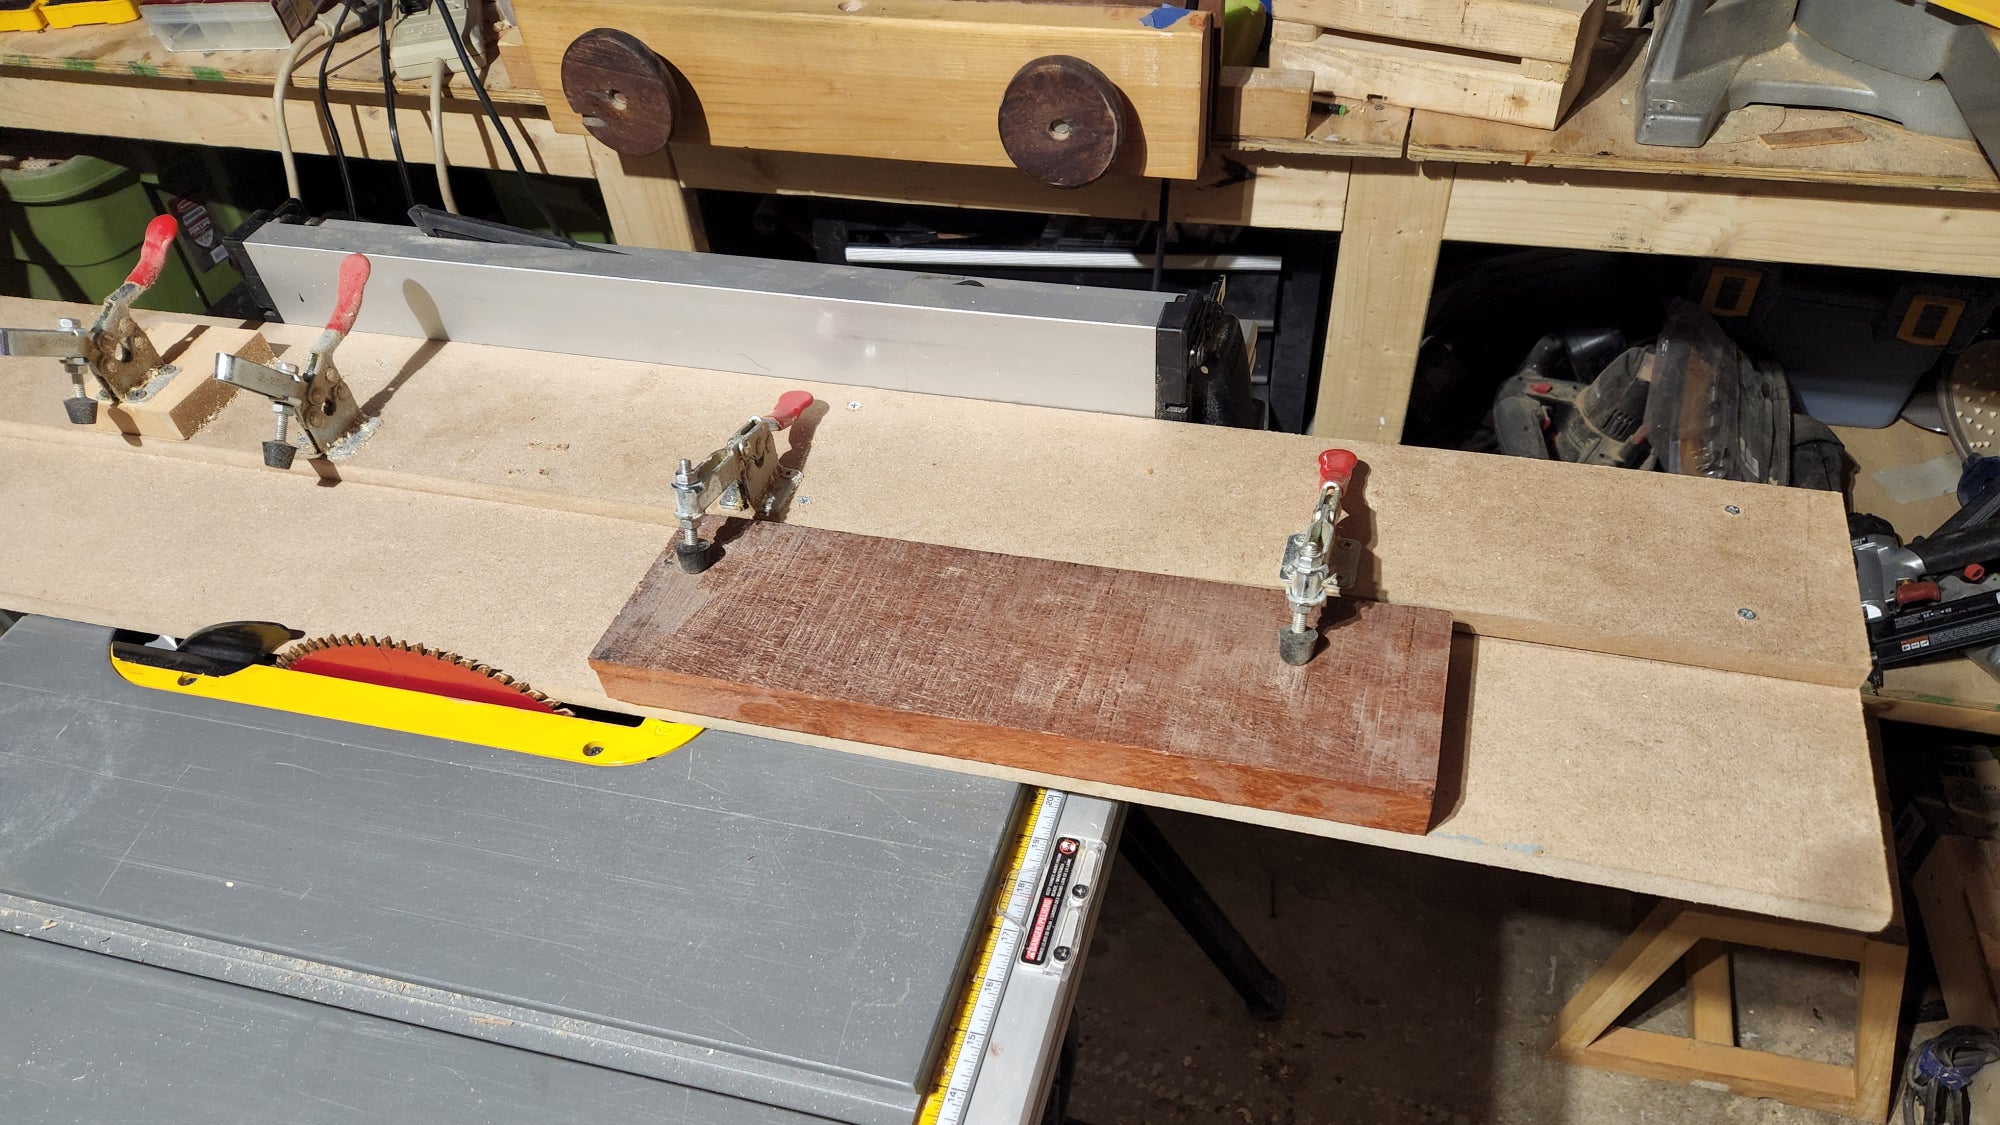
There is nothing substandard with the stage manner, however in the occasion you’d esteem a resolution that’s a small bit extra real and permanent, decide into myth a jointer sled. This uncomplicated jig clamps your board in space so that you just received’t must peril about pushing two objects by your desk saw on the an identical walk. I’m no longer entirely tickled trying to soundly maneuver two objects next to a spinning blade, so I dangle this to the stage manner.
As a bonus, you could presumably per chance per chance presumably employ this sled as a tapering jig.
Stats
- Time: 1 to 2 hours
- Payment: $40 to $60
- Pains: easy
Materials
- 1 quarter-sheet of ½-go plywood (could presumably per chance per chance even be better in narrate for you an extended sled)
- Picket glue
- ¾-go picket screws
- Toggle clamps
Instruments
- Drill
- Clamps
Directions
1. Minimize two 4-foot-lengthy strips of plywood. The width of each could presumably per chance per chance even be whatever works excellent for you. My sled is 10 inches wide, so I nick a 10-go-wide strip for the defective of the sled. The broader this strip, the broader the boards you could presumably per chance per chance joint. I nick the opposite strip—the riser board that can withhold the toggle clamps—to about 5 inches wide, however you could presumably per chance per chance construct it any width that can unruffled fit your toggle clamps. My dimensions can joint 3- to 9-go boards rather without speak.
2. Glue the 5-go board to the pause of the 10-go board. First, line the narrower board up with the correct edge and overhang it a 16th of an go or so. Don’t skip this overhang, as this point out you could presumably per chance per chance square the sled in the next stream. Are attempting to withhold it rather consistent all the way in which by the fat length of the sled. Employ a few clamps to withhold it in space.
3. Screw the riser board in p